How To Lay Pavers, Brick, Patio Stone and Stone Pavers
Begin by assessing what is currently in the project area where you intend to lay your new pavers. If you have a lot of sugar sand, you are going to want to remove as much as possible. If the water table is high in your area, or you have water and/or flooding issues, the base material depth will have to change. In Florida, we live in dirt, sand, and if you are lucky you may have a lime rock bed under the area (which is unlikely). Therefore, you must take precautionary measures to ensure your pavers will not fail over time. Follow the simple steps below to make sure your hard-scape lasts in our tropical climate.
1
Choosing your Pavers/Patio Stones:
Pavers, Patio Stones, Clay Brick, Turf Block, travertine, Natural Flagstone, etc. are available in a wide variety of colors, shapes, sizes, and strengths. There are different products to match different applications. Here are a few “rules” to follow when choosing a hardscape for your project:
Thin pavers/brick are NEVER to be used for a driving surface. I don’t care what you have heard, unless you have a specially engineered, high-strength, polymer product specifically designed to be driven on, you will ruin thin pavers/brick if you drive on them. No matter if they are all mortared to a concrete slab or have 12” of base under them, they will fail.
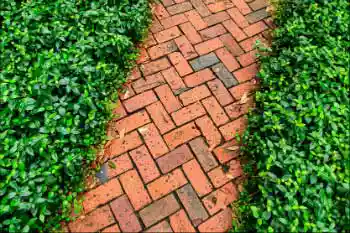
For a driveway, you should install a minimum of a 2” thick paver/brick. They should be approximately 7800psi+. If installing travertine, 6”x12” should be the maximum size pieces used and MUST be laid in a 90 degree herring bone pattern ONLY. Some Natural Flagstone and Natural Cobble Stone is strong enough for a driveway, however the installation can be difficult if the stone is not the same height. For walkways, any size patio stone, paver, brick, Natural Flagstone, etc. may be used, provided the proper underlayment has been installed.
Patio Stones are NEVER to be used for a driveway. They will crack the first time you attempt to drive on them. Only use in areas with foot traffic and be sure to use a rubber mallet to set them in place. DO NOT run a plate compactor over them after installing as you would a typical paver. Patio Stones are typically only 1200-1300psi.

2
Mark the Project Area Dimensions:
If your project is square or rectangular, drive a spike into each corner and draw a string line or spray paint the lines between the spikes to mark where you will be digging. For an irregularly shaped project, simply mark the edges with spray paint or lay a garden hose along the outer edge to mark the area.
3
Grade Stakes:
Place Grade Stakes at the edges of the project area. Drive the stakes down until the top reaches the desired height of the new Paver Area. Later as you dig you draw a string line between the stake, then Measure down to the desired depth to allow for the Paver Base Material. Make sure that you slope your new project so that water will run off were you want it and not into a garage or living room.
4
The Dig Out:
You need to remove about 8 inches of earth to install pavers and a base for them. This will allow for 5 inches of Screenings, 1/2 inch of Diamond Sand, and the thickness of the paver, which is generally about 2 1/2; inches. If your pavers are thicker or thinner, change your excavation depth accordingly. As you dig, periodically place a string Line across the area from grade stake to grade stake, then measure down to check the excavation depth.
You need to remove trees, shrubs, grass, roots, concrete, etc. from the area you intend to install your new hardscape. It is important to make sure you have removed all organic matter from the area. Organic material will break down over time and create air pockets in the substrate. The void will eventually cave in, causing your pavers to cave as well. Make sure you allow for the proper amount of base, sand, mortar, etc. so the elevation of the finished product reaches the desired height when installation is complete.
5
Base Materials:
Do not confuse “base” with “sand.” Sand alone is NEVER a good base material. Typical base materials common in our area are: Crushed Concrete (Concrete Screening), Lime Rock Screening, and sometimes finely crushed shell if your project requires a permeable base. Shell has faded out as a base for the most part as screenings are cheaper and provide a stronger, measurable base. Screenings come in various sizes, the most common (and what we stock) is 3/8” minus Concrete and Lime Rock. This size base will suffice for most residential and commercial applications unless otherwise specified.
The base must be laid a minimum of 3” no matter what the application and must be packed to qualify a 95% plus. We recommend 3” for foot traffic and 5-6” for drive/parking areas. The depth can vary based on building conditions. Lime and Concrete Screening perform slightly different from each other. While both pack very hard, concrete screening will allow a small amount of drainage while lime will not.
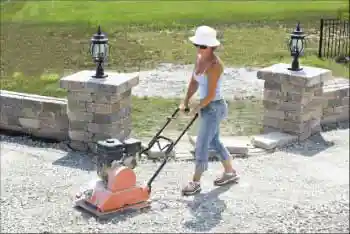
When you begin laying the base, slightly moisten the sub-grade (which at this point should be clean, graded fill dirt) and lay 3” of base. If using a hand tamper or plate compactor (most common), you cannot lay more than 3” at a time without compacting. If using a jumping jack or riding rolling machine, you can lay it deeper before packing. Keep in mind however the deeper you lay the material, the more difficult it is to pack as the machine will bury itself in the loose material. Moisten, DO NOT SOAK/SATURATE the Base Material. Then run your machine across the base in all different directions until it glides across the surface without sinking in.
6
Sand:
Most people have a number of misconceptions about how, when and where to use sand when laying pavers. Sand is NOT a base material. After your base is compacted, lay ½” of Diamond Sand maximum. This will give you a nice, flat surface to work off of as the base will not be “perfectly flat.” The biggest misconception about sand is that by sweeping it in the joints after laying the pavers, that is will lock the pattern in place. This is simply not true. The sand laid between the base and the paver is what locks the pattern in place. That said, you do not want to lay more than ½” (Diamond Sand). Remember, sand is too dense to pack and will always shift and move. It will, however, create a solid “cushion” when caught between two hard surfaces such as base and a paver. After laying your pavers, place another ½” of Sand (This time Using Mason Sand) across the surface of the paver and run your plate compactor up and down, side to side and diagonally across the freshly laid pavers.
This layer of sand will act three-fold. First, it will act as a lubricant to help the compactor slide across the pavers. Second, it will act as a barrier between the compactor and paver so the plate doesn’t scratch or crack the surface of the newly laid pavers. Third, your pavers will have a nice sand-swept joint after the excess sand is removed. Notice that we recommend two types of Sand: Diamond Sand (Course Sand) for the top 1/2” of the base, then Mason Sand (Fine Sand) across the surface and between the pavers.
7
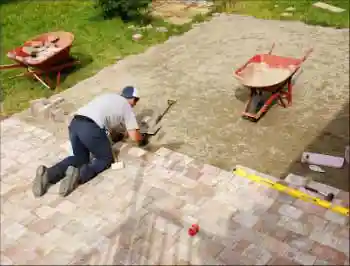
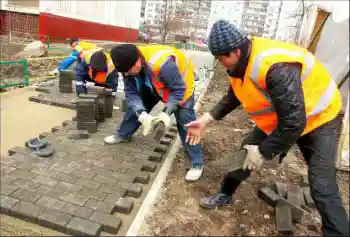
Setting the Pavers:
After all the prep work is done start placing your pavers in the sand, using your straight edge as a guide. Butt the pavers close together. There should still be a thin joint line between the pavers that will be filled with sand later. Use a straight edge to ensure Paver are level. Use a rubber mallet to knock down any high pavers. Add more Diamond Sand and reset any low pavers. If you were diligent leveling the sand, you should only have a minimal amount of leveling at this stage.
8
Laying pavers over an existing slab:
9
Brick Distribution:
If you are installing more than 1 pallet it is a good practice to pull Brick from several different pallets as you work through your project. If there are slight color variations, this practice will help to minimize any noticeable difference.
10
Cutting pavers:
You may need to cut pavers along the edges of your project. A diamond blade works well to cut through Pavers. You can use a common circular saw with a diamond blade, or a 4-inch angle grinder with a diamond blade, however, the easiest and safest way is with a brick saw. It’s like a big chop saw with a diamond blade.
You can also use a hammer and chisel to cut pavers. This is the old-fashioned way, but it still works today. If you only have to cut a few pieces and do not want the hassle and added expense of renting a saw, a hammer and chisel will do just fine.
11
Concrete Restraining Edge:
After pavers are installed, there must be a restraining edge put in place to keep the pattern from spreading and your project from falling apart. We recommend a concrete restraining edge. There are few different products on the market, but concrete is tried, tested and proven to last in the harsh weather we have here in Florida. Steel rusts, plastic splits and cracks and sod is soft.
A mini “footer” can be dug with a hand shovel along the edge of the un-restrained pavers approximately 3” wide and 3” deep. Lay mixed concrete in the footer, coming half way up the paver. Strike the mud, angling it down away from the paver from top to bottom. This will provide a clean, smooth, strong edge that will look good and last.

12
Sealing:
Sealing hardscapes is a great way to add longevity to your project. It is particularly important to seal Portland based materials as they are porous and collect stains much easier than clay or natural stone. Sealing is essential around pools to keep grit out of pumps. Staining will also “enhance” the color of your hardscape. There are a number of different sealers on the market. Acrylic and water base are the most common, coming in a range of gloss from 10-100, measured in increments of 10. We recommend a good acrylic base (such as Tuf Top). Tuf Top is a medium 50-60 Gloss.
There are a couple of important steps to follow before using an acrylic sealer. First, you MUST make sure the pavers are VERY dry. If you use an acrylic sealer on a damp/wet surface, the sealer will turn hazy white and ruin the surface of the pavers. At that point, it would be cheaper to replace the pavers than to try and get the sealer off. That said, a simple test will tell whether it is safe to seal your project. Take a regular plastic garbage bag and cut it up into a couple of good size pieces. Lay the pieces of plastic on the pavers in random areas, especially any shaded areas, in the heat of the afternoon. Put some brick or something heavy on top of it to hold it flat to the surface of the pavers. Wait about 30 minutes and pull up the plastic. If there is any moisture on the underside of the plastic, DO NOT ATTEMPT to seal. Wait and do another test the following day to see if they have dried out enough.
Second, apply the sealer using a tight nap roller cover. You CANNOT spray acrylic sealer (most brands anyway) from a pump sprayer. It must be rolled on in light coats, 7-8 hours apart (times vary depending on weather conditions). Before beginning the second coat, touch the surface of the pavers with your fingertips. If it feels “tacky,” do not attempt to put the second coat on yet. Wait until they don’t feel sticky and then roll on the second coat. Do not soak the roller cover with sealer. You want to apply multiple light coats so the sealer doesn’t leave streaks. Apply a minimum of two coats. Water based sealers can be used immediately but traditionally do not last as long and must be re-applied more often. Also, the higher the gloss the better the chance of getting streaks.